
Pages

Wednesday, November 5, 2008

JJ Awake Thinking of You


Click on tag to see full size
This tutorial is written for those with working knowledge of PSP.

I used PSP 9 for this tutorial, but it could be done with other versions I'm sure.

~Supplies you will need~
1 Tube of choice – I used the awesome work of Jennifer Janesko. Please do not use her work without a license from C.I.L.M .
Free Scrap Kit –Black Grape HERE at Candy’s Treat blog. Thank you!
Word Art by Missy HERE as I was unable to find her site, but Thank you Missy!
If someone knows where her site is please let me know.
Font of choice
Eye Candy 4000 Gradient Glow

~Okay Let’s get started~
Don’t forget to rename layers as you go
You might want to Adjust > Sharpen after you resize anything you need to.
Open a 600 x 600 transparent image (we will resize later)
Flood Fill with white
Open and minimize “Black Swirl” paper
Material Palette > Background –select the paper as a “Pattern-scale 50,” Foreground- Purple chosen from the paper
Grab your Rectangle Pre-set Shape Tool > Line style – Diamond, Width-6
Draw out a rectangle (use my tag as an example), Convert to a Raster & add a drop shadow or Eye Candy 4000 > Gradient Glow –Glow width 5, Color –Gray
Image > Rotate > Free Rotate – 15 Left- move rectangle to the right a bit
Layers > Duplicate, Image > Mirror
Open and minimize “Grape Swirl” paper
Material Palette > Background –select the paper as a “Pattern-scale 50,” Foreground- Purple chosen from the paper
Grab your Rectangle Pre-set Shape Tool > Line style – Diamond, Width 6
Draw out a rectangle a lil’ smaller than the first (use my tag as an example), Convert to a Raster & add a drop shadow or Eye Candy 4000 > Gradient Glow –Glow width 5, Color –White
Image > Rotate > Free Rotate – 15 Right- move to the right a bit
Layers > Duplicate, Image > Mirror
X out the white background, Merge > Merge Visible, un-X white background
Layers > Duplicate –papers, Image > Resize by 80%- resize all unchecked
Layers > Duplicate – smaller papers, Image > Resize by 80%- resize all unchecked
X out the white background, Merge > Merge Visible, un-X white background
Copy & paste “Heart Ribbon3” add a drop shadow or Eye Candy 4000 > Gradient Glow –Glow width 5, Color –Black
Copy & paste “Heart Ribbon1” add a drop shadow or Eye Candy 4000 > Gradient Glow –Glow width 5, Color –Black, position at the top of the papers
Layers > Duplicate, Image > Mirror
Copy & paste “Glitter Swirl 1” add a drop shadow or Eye Candy 4000 > Gradient Glow –Glow width 5, Color –Black
Copy & paste main tube as New Layer, Resize 120% , use deform tool to stretch her the rest of the way out so that her edges do not show
Drop Shadow – V,H (-5), Opacity 40, Blur 5, Black
Copy & paste “Flower 5, “resize by 60%
Copy & paste “Flower 6, “resize by 40%, position on top of “Flower 5”
Merge > Merge Down –both flowers, add a drop shadow or Eye Candy 4000 > Gradient Glow –Glow width 5, Color –Black
Position the flowers layer under the “Glitter Swirl”
Copy and paste “Beads 2” as a new layer – resize 80%, add a drop shadow or Eye Candy 4000 > Gradient Glow –Glow width 5, Color –light purple
Merge > Merge Down all 3 “Papers” layers
Merge > Merge Down all 3 “Heart Ribbon” layers
Merge > Merge Down both “Beads” layers
Copy and paste “Black-Embellishment” as a new layer – resize 80%, add a drop shadow or Eye Candy 4000 > Gradient Glow –Glow width 5, Color –light purple
Position below “Flowers” Layer
Copy and paste “Bow 4” as a new layer, resize by 60%, add a drop shadow or Eye Candy 4000 > Gradient Glow –Glow width 5, Color –Black
Choose Word Art from Missy, add a drop shadow or Eye Candy 4000 > Gradient Glow –Glow width 5, Color –light purple
Layer Palette > 7 layers from top to bottom should be: Word Art, Main Tube, Black Bow, Heart Ribbons, Black Glitter Swirl, Beads, Flowers, Black Embellishment, Papers & white background
Image > Resize –ALL by 80%
Apply all Copyright Credits
Save a Blank- File > Save As > JPEG
Add your name, Lokas > Gel and Eye Candy 4000 > Gradient Glow –Glow width 3, Opacity 40 Color –White
Save As > JPEG

DONE I hope you enjoyed this tut
If you have any problems please feel free to e-mail me at: starladystudio@bellsouth.net
HUGS StarLady

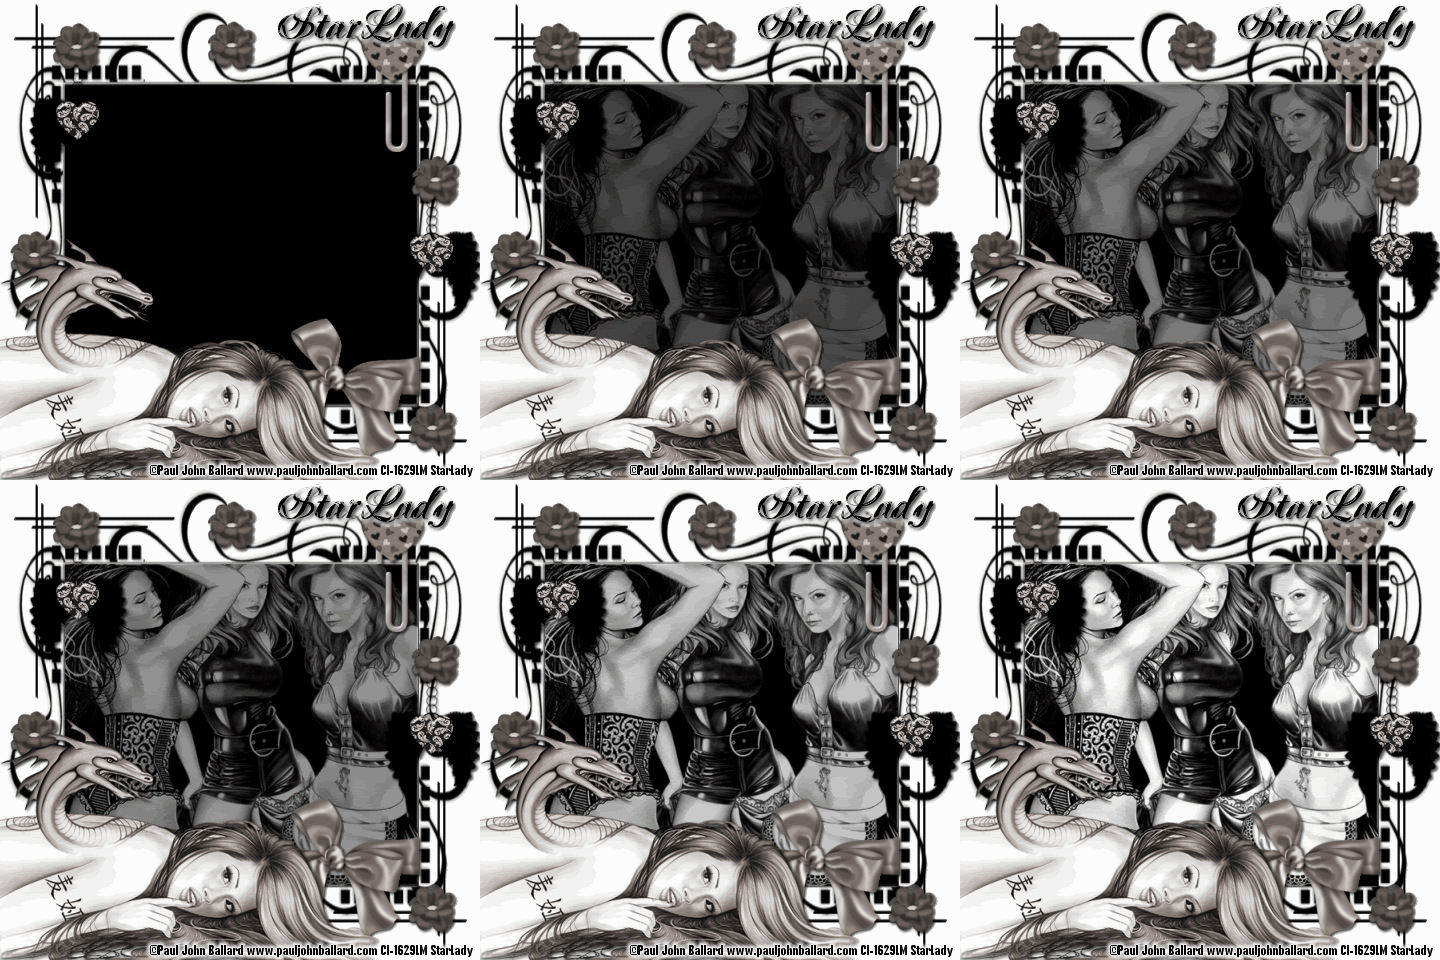
PJ Ballard Crush


Click on tag to see full size
This tutorial is written for those with working knowledge of PSP.

I used PSP 9 for this tutorial, but it could be done with other versions I'm sure.

~Supplies you will need~
4 tubes of choice – I used the awesome work of Paul John Ballard. Please do not use his work without a license from C.I.L.M .

Mask 63 by Zuzzanna –You can get the Mask HERE about half way down the page. Thank you Zuzzanna!

Scrap Kit –Girly Crush “Freebie Add On” HERE at Candy’s Treat blog. Thank you!

Font of choice

~Okay Let’s get started~

Don’t forget to rename layers as you go
You might want to Adjust > Sharpen after you resize anything you need to.
Open and minimize mask in PSP
Open a 600 x 600 transparent image (we will resize later)
Flood Fill with white
New Raster Layer > Flood Fill with Black
Layers > New Mask Layer > From Image (Source Luminance & Invert Mask Data checked)
Layer Palette > Delete Mask Layer > Merge > Merge Group
Grab 3 tubes you would like to use > Copy and Paste As New Layers
Position & resize as you like over the “Big Square” of the mask
Merge > Down all of the tubes > X-Out “3 Tubes” layer for now
Use your Rectangle Selection tool to select the “Big Square”
Activate & un-X “3 Tubes layer” > Selections > Invert > Hit Delete on your keyboard
Selections > Select None
While still on the “3 Tubes” Layers -Adjust > Hue & Saturation > Colorize > Hue doesn’t matter, Saturation 0.
Copy & Paste “Wrapped Bow 2” from the scrap kit > Resize by 60 > Add a drop shadow
Position so that it looks like it “wraps” around the mask
Copy & Paste “Paper Clip 5” from the scrap kit > Resize by 60
Position as on my tag, use the Eraser to erase part of the paper clip to make it look “clipped” onto the mask- add a drop shadow
Copy & Paste “featherwingsCharm3” from the scrap kit > Resize by 60 –add a drop shadow
Duplicate and position as on my tag.
Copy & Paste “flower 14” as new layer > Add a drop shadow > Duplicate as many times as you like and position around the tag
Copy and Paste the 4th tube (main tube) as a new layer –at the top of the layer palette, resize if needed and position on your tag
X- out the white background, Mask, 3 background tubes, and the main tube
Merge > Merge Visible all of the “Elements” left on the tag
While still on the “Elements” Layer -Adjust > Hue & Saturation > Colorize > Hue doesn’t matter, Saturation 19.
Un-X all layers and repeat Colorize on the Main tube
From top to bottom in the layer palette you should have –Main Tube, Elements, 3 Tubes, Mask and White Background
Image > Resize –ALL by 80%

~Have Animation Shop open~
Activate the “3 Tubes” layer > Opacity to 0, Edit > Copy Merged in PSP, Right Click on workspace in AS > Paste as New Animation
Back to PSP - 3 Tubes Layer > Opacity to 20, Edit > Copy Merged in PSP, Right Click the on tag in AS > Paste > After Current Frame
Back to PSP - 3 Tubes Layer > Opacity to 30, Edit > Copy Merged in PSP, Right Click the on tag in AS > Paste > After Current Frame
Repeat – Increasing the Opacity by 10 each until you have pasted the last layer (opacity at 100) (total 10 frames)
In AS - Edit > Select All, Animation > Frame Properties change to 25, View Animation –the 3 tubes should fade in nicely.
Back to PSP- write out copyright credits, Edit > Copy, In AS Right Click on the workspace-Paste As New Animation, Edit > Copy-credits, Make sure to hit the Propagate Paste button in the tool bar, Right Click on your tag –Paste > Paste Into Selected Frame
Save the Blank as a GIF
Back to PSP- write out your name, Edit > Copy, In AS Right Click on the workspace- Paste As New Animation, Edit > Copy-name, Right Click on your tag –Paste > Paste Into Selected Frame
Save as a GIF.

DONE I hope you enjoyed this tut
If you have any problems please feel free to e-mail me at: starladystudio@bellsouth.net
HUGS StarLady

Rocky Balboa ; World Trade Center

This morning, amongst other things, I got a chance to watch most of "World Trade Center" and "Rocky Balboa" on Showtime which we are getting 6 months free as Hurricane Support from Direct TV.

When it comes to "World Trade Center" I was rather bored with it. I understand it was a made as a contribute to 911, but as movies go I was bored. I am not even worried about catching the rest of it. It was coming back on right after "Rocky Balboa". I am watching "Erin Brockovich" now while typing this.

On the other hand, "Rocky Balboa" was pretty good. I thought it was going to be a disappointment, but to my surprise it wasn't. It was a very heartfelt side of "Rocky". All that I ask is, as much as I LOVE all the "Rocky" movies enough, is enough. This movie was a prefect way to end the series. Applause to Sylvester Stallone and everyone who made the movie what it turned out to be.

Okay back to my tag and tutorial. HUGS to all StarLady
Photobucket