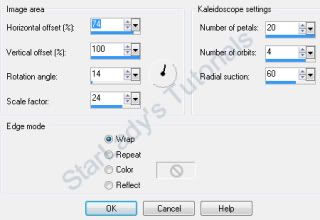
Done with "Which List are You On"

Click on tag to see full size
This tutorial is written for those with working knowledge of PSP.
I used PSP 9 for this tutorial, but it could be done with other versions I'm sure.
~Supplies you will need~
Supplies HERE
1 Tubes of choice – I used the awesome work of Suzanne Richards. Please do not use her work without a license from C.I.L.M .
Free “Christmas Around the World Kit” by Voodoo- Thanks darlin’!! (in zip)
Eye Candy 4000 > Gradient Glow (optional –used on my name)
Alien Skin Eye Candy Nature > Snow Drift
“Falling Snow” (in zip)
The Font I used is called "5th Grader Bold"
The Drop Shadow I used is V,H (-5),Opacity 40, Blur 5, Color -Black
~Okay Let’s get started~
Don’t forget to rename layers as you go
You might want to Adjust > Sharpen after you resize anything you need to.
Open a 600 x 600 transparent image (we will resize later)
Open the “tree deco’, copy and paste it on your tag, Resize it by 60%, add a drop shadow
Open your tube, copy and paste it on your tag, Resize it by 60%, add a drop shadow
On the “Christmas Tree” layer add Effects > Alien Skin Eye Candy Nature > Snow Drift > Large First Flakes
Add a New Raster Layer just above the “White Background”
Grab “paper 12” from the kit > Material Palette > Foreground > paper 12 > Angle 0, Scale 50 > Flood Fill the new layer
Open a Mask in PSP – Layers > New Mask Layer > From Image > Okay
Layer Palette > Delete Mask Layer > Merge Group
From the kit grab some presents > Copy and paste > resize each by at least 30% position along the bottom in front of the Christmas Tree –add a drop shadow to each as you go
Open “banner blank”, copy and paste it on your tag, Resize it by 80% DO NOT add a drop shadow yet.
Open the “Holly” –Copy and Paste > Resize by 80% -position on the right size of the banner > Image > Mirror – you may still need to position it on the left side of the banner
Layer Palette > Make sure both “Holly” layers are directly above the “Banner”
Activate the top “Holly” layer > Right click > Merge Down, again Right click > Merge Down (you should now have the banner and two pieces of holly on one layer- I renamed it “Banner” –Now add a drop shadow
Image > Resize ALL layers by 80%
Add all Copyright Credits
~Now for the Snow~
Open Animation Shop
Layer Palette > X out the tube and banner layer – Edit > Copy Merged
Paste as New Animation in AS
Open the “Falling Snow” in AS- Minimize it for now
Select your Tag –Edit > Duplicate Selected until you have 10 frames
Get your “Falling Snow”- Edit > Select All > Edit > Copy
Minimize the snow again
Make sure “Propagate Paste” is toggled on in the Tool Bar
Your Tag- Edit > Select All, Edit > Paste > Into Selected Frame
View > Animation (the snow should be falling lol)
Go back to PSP – Un-X your Tube –Edit > Copy
Paste as New Animation in AS > Edit > Copy
Your tag- Edit > Paste > Into Selected Frame
Go back to PSP – Un-X your Banner –Edit > Copy
Paste as New Animation in AS > Edit > Copy
Your tag- Edit > Paste > Into Selected Frame
View > Animation (make sure nothing is “jumping”)
SAVE AS a GIF (blank)
Add any other Text you would like
I used Eye Candy 4000 > Gradient Glow 2 times (Change Glow Width to 3) with White then Red
Save AS Again
DONE I hope you enjoyed this tut.
If you have any problems please feel free to e-mail me at: starladystudio@bellsouth.net
'Let me explain the problem science has with religion. The atheist professor of philosophy pauses before his class and then asks one of his new students to stand. 'You're a Christian, aren't you, son?' 'Yes sir,' the student says . 'So you believe in God?' 'Absolutely.' 'Is God good?' 'Sure! God's good.' 'Is God all-powerful? Can God do anything?' 'Yes' 'Are you good or evil?' 'The Bible says I'm evil.' The professor grins knowingly. 'Aha! The Bible!' He considers for a moment. 'Here's one for you. Let's say there's a sick person over here and you can cure him. You can do it. Would you help him? Would you try?' 'Yes sir, I would.' 'So you're good...!' 'I wouldn't say that.' 'But why not say that? You'd help a sick and maimed person if you could. Most of us would if we could. But God doesn't..' The student does not answer, so the professor continues. 'He doesn't, does he? My brother was a Christian who died of cancer, even though he prayed to Jesus to heal him. How is this Jesus good? Hmmm? Can you answer that one?' The student remains silent. 'No, you can't, can you?' the professor says. He takes a sip of water from a glass on his desk to give the student time to relax. 'Let's start again, young fella. Is God good?' 'Er..yes,' the student says. 'Is Satan good?' The student doesn't hesitate on this one. 'No.' 'Then where does Satan come from?' The student falters. 'From God' 'That's right. God made Sa tan, didn't he? Tell me, son. Is there evil in this world?' 'Yes, sir.' 'Evil's everywhere, isn't it? And God did make everything, correct?' 'Yes' 'So who created evil? The professor continued, 'If God created everything, then God created evil, since evil exists, and according to the principle that our works define who we are, then God is evil.' Again, the student has no answer. 'Is there sickness? Immorality? Hatred? Ugliness? All these terrible things, do they exist in this world?' The student squirms on his feet. 'Yes.' 'So who created them?' The student does not answer again, so the professor repeats his question. 'Who created them?' There is still no answer. Suddenly the lecturer breaks away to pace in front of the classroom. The class is mesmerized. 'Tell me,' he continues onto another student. 'Do you believe in Jesus Christ, son?' The student's voice betrays him and cracks. 'Yes, professor, I do.' The old man stops pacing. 'Science says you have five senses you use to identify and observe the world around you. Have you ever seen Jesus?' 'No sir. I've never seen Him.' 'Then tell us if you've ever heard your Jesus?' 'No, sir, I have not.' 'Have you ever felt your Jesus, tasted your Jesus or smelt your Jesus? Have you ever had any sensory perception of Jesus Christ, or God for that matter?' 'No, sir, I'm afraid I haven't.' 'Yet you still believe in him?' 'Yes' 'According to the rules of empirical, testable, demonstrable protocol, science says your God doesn't exist. What do you say to that, son?' 'Nothing,' the student replies. 'I only have my faith.' 'Yes, faith,' the professor repeats. 'And that is the problem science has with God.. There is no evidence, only faith.' The student stands quietly for a moment, before asking a question of His own. 'Professor, is there such thing as heat?' Yes. 'And is there such a thing as cold?' 'Yes, son, there's cold too.' 'No sir, there isn't.' The professor turns to face the student, obviously interested. The room suddenly becomes very quiet. The student begins to explain. 'You can have lots of heat, even more heat, super-heat, mega-heat, unlimited heat, white heat, a little heat or no heat, but we don't have anything called 'cold'. We can hit up to 458 degrees below zero, which is no heat, but we can't go any further after that. There is no such thing as cold; otherwise we would be able to go colder than the lowest -458 degrees. 'Everybody or object is susceptible to study when it has or transmits energy, and heat is what makes a body or matter ha ve or transmit energy. Absolute zero (-458 F) is the total absence of heat. You see, sir, cold is only a word we use to describe the absence of heat. We cannot measure cold. He at we can measure in thermal units because heat is energy. Cold is not the opposite of heat, sir, just the absence of it.' Silence across the room. A pen drops somewhere in the classroom, sounding like a hammer. 'What about darkness, professor.. Is there such a thing as darkness?' 'Yes,' the professor replies without hesitation. 'What is night if it isn't darkness?' 'You're wrong again, sir. Darkness is not something; it is the absence of something. You can have low light, normal light, bright light, flashing light, but if you have no light constantly you have nothing and its called darkness, isn't it? That's the meaning we use to define the word.' 'In reality, darkness isn't. If it were, you would be able to make darkness darker, wouldn't you?' The professor begins to smile at the student in front of him. This will be a good semester.. 'So what point are you making, young man?' Yes, professor. My point is, your philosophical premise is flawed to start with, and so your conclusion must also be flawed.' The professor's face cannot hide his surprise this time. 'Flawed? Can you explain how?' 'You are working on the premise of duality,' the student explains... 'You argue that there is life and then there's death; a good God and a bad God. You are viewing the concept of God as something finite, something we can measure. Sir, science can't even explain a thought.' 'It uses electricity and magnetism, but has never seen, much less fully understood either one. To view death as the opposite of life is to be ignorant of the fact that death cannot exist as a substantive thing. Death is not the opposite of life, just the absence of it.' 'Now tell me, professor. Do you teach your students that they evolved from a monkey?' 'If you are referring to the natural evolutionary process, young man, yes, of course I do.' 'Have you ever observed evolution with your own eyes, sir?' The professor begins to shake his head, still smiling, as he realizes where the argument is going. A very good semester, indeed. 'Since no one has ever observed the process of evolution at work and cannot even prove that this process is an on-going endeavor, are you not teaching your opinion, sir? Are you now not a scientist, but a preacher?' The class is in uproar. The student remains silent until the commotion has subsided. 'To continue the point you were making earlier to the other student, let me give you an example of what I mean.' The student looks around the room. 'Is there anyone in the class who has ever s een the professor's brain?' The class breaks out into laughter. ' Is there anyone here who has ever heard the professor's brain, felt the professor's brain, touched or smelt the professor's brain? No one appears to have done so. So, according to the established rules of empirical, stable, demonstrable protocol, science says that you have no brain, with all due respect, sir. 'So if science says you have no brain, how can we trust your lectures, sir?' Now the room is silent. The professor just stares at the student, his face unreadable. Finally, after what seems an eternity, the old man answers. 'I guess you'll have to take them on faith.' 'Now, you accept that there is faith, and, in fact, faith exists with life,' the student continues. 'Now, sir, is there such a thing as evil?' Now uncertain, the professor responds, 'Of course, there is. We see it everyday It is in the daily example of man's inhumanity to man. It is in the multitude of crime and violence everywhere in the world. These manifestations are nothing else but evil.' To this the student replied, 'Evil does not exist sir, or at least it does not exist unto itself. Evil is simply the absence of God. It is just like darkness and cold, a word that man has created to describe the absence of God. God did not create evil. Evil is the result of what happens when man does not have God's love present in his heart. It's like the cold that comes when there is no heat or the darkness that comes when there is no light.' The professor sat down. If you read it all the way through and had a smile on your face when you finished, mail to your friends and family with the title 'God vs Science' The student was Albert Einstein. Albert Einstein did write a book titled God vs Science in 1921... |

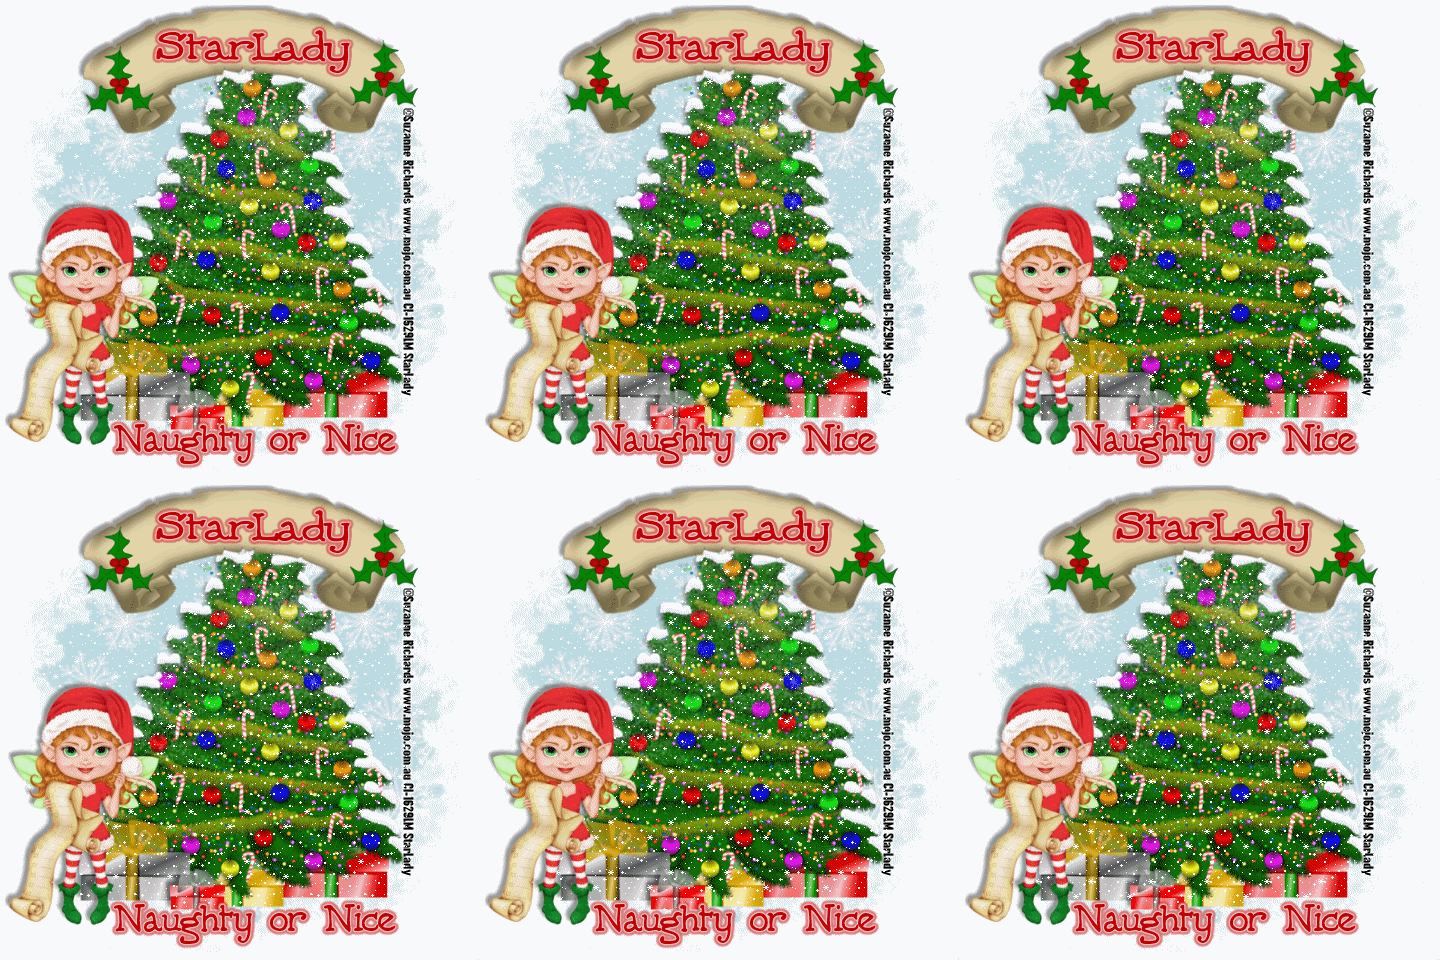
Click on tag to see full size
This tutorial is written for those with working knowledge of PSP.
I used PSP 9 for this tutorial, but it could be done with other versions I'm sure.
~Supplies you will need~
Supplies HERE
4 Tubes of choice – I used the awesome work of Al Rio. Please do not use his work without a license from C.I.L.M .
Free “Christmas Around the World Kit” by Voodoo- Thanks darlin’!!
2 Free kits “SE Weekend Freebie 110607” & “SE Love” by Melissa -Thanks darlin’!!
Plug-in – Alien Skin Xenofex 2 > Rip Open
Eye Candy 4000 > Gradient Glow (optional –used on my name)
Font of choice - I used "Frosty"
~Okay Let’s get started~
Don’t forget to rename layers as you go
You might want to Adjust > Sharpen after you resize anything you need to.
Open a paper –I used “paper 12” (we will resize later)
Material Palette > Background-set the same paper as a Pattern, Foreground-choose a color that matches the paper and/or tubes you will use
On the top left of the tag draw out a nice size square, Layers > Duplicate 2 times, position both one under the other on the left
Grab the Rectangle Selection tool, select inside the diamond line style of the top square
Copy and paste a tube as a New Layer, position over the square as you choose, Selections > Invert > Hit Delete on your keyboard
Move the tube layer under the top square layer, Activate top square layer, Effects >Alien Xenofex 2 >Rip Open
Repeat the above for the other 2 squares.
X-out the Background Layer, Merge > Merge Visible (merging all the squares & tubes together), Add a drop shadow – V,H, (-5), Opacity 40, Blur 5, Color –Black, Un-X the Background layer
Grab the Rectangle Pre-set Shape Tool, Draw out a big rectangle, Convert it to a Raster
Copy, paste & position a tube over the rectangle, Layers Duplicate the tube 1 time
X-out the “copy” of the tube
Grab the Rectangle selection tool again, select inside the diamond line style of the rectangle, Select the original tube layer, Selections > Invert > Hit Delete on your keyboard
Move the tube layer under the Rectangle layer
Un-X the “copy” of tube layer, using the Freehand Selection Tool select all the parts of the tube that you do not want to stick out. Hit Delete on your keyboard
Open the “Weekend Freebie Kit, “ Grab the SE_IBelieve Beaded Ribbon, Image > Rotate > Free Rotate > 45 Left, Position as you choose on the tag, Adjust > Sharpness > Sharpen
While still on the Beaded Ribbon layer -Grab the Rectangle Selection Tool > select inside the diamond line style of the rectangle > Selections > Invert > Hit Delete on your keyboard
To get rid of any extra ribbon “sticking out” over the ripped parts of the rectangle use the Freehand Selection tool > Hit delete on you keyboard
From the “SE Love” kit –Grab the “SE_Love_Bow” & position where you choose on the “Beaded Ribbon”
X-out the Background layer & Squares layer, Merge > Merge Visible (everything to do with the rectangle), Add the same drop shadow as before
You should now only have 3 layers from top to bottom- “Rectangle” layer, “Squares” layer & the “Background” layer
Image > Resize ALL 80%
Add all copyright credits
Image > Add Border -color>Red >border size 2-Symmetric Checked (will also merge all layers on the layer palette)
Save the Blank as a JPEG
Go back –add any text, Save As again
DONE I hope you enjoyed this tut.
If you have any problems please feel free to e-mail me at: starladystudio@bellsouth.net
HUGS StarLady
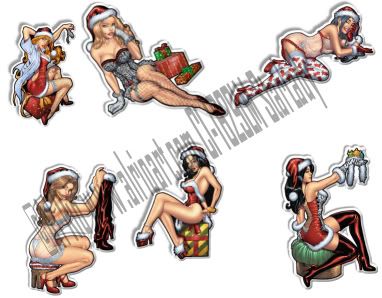
Click on image to see full size
This tutorial is written for those with working knowledge of PSP.
I used PSP 9 for this tutorial, but it could be done with other versions I'm sure.
~Supplies you will need~
Tubes of choice – I used the awesome work of Al Rio. Please do not use his work without a license from C.I.L.M .
~Okay Let’s get started~
You might want to Adjust > Sharpen after you resize anything you need to.
Open a 600 x 600 transparent image to store them on
Flood Fill with white –set aside
To make a “sticker look” to each tube you use.
Pick 1 tube – Window > Duplicate –close the original tube.
Image > Canvas Size > change to 700 X 700 (just so you know you have enough room to work with lol)
Selections > Select All > Float > Defloat
Selections > Modify > Expand by 2
Add a New Raster layer and pull below tube layer, Flood Fill- Black INSIDE the ants (DO NOT Deselect)
Selections > Modify > Expand by 8
Add a New Raster layer and pull below the black layer you just made, Flood Fill- White INSIDE the ants
Selections > Select None
Merge > Merge Visible
Copy and paste onto white canvas
Effects > 3-D Effects > Inner Bevel –settings:
Bevel: shape 2, Width 20, Image Smooth 22, Depth 5, Ambience (-5), Shininess 36, Angle 319, Intensity 36, Elevation 45, Color-White,
Add a drop shadow-settings: V, H (-5), Opacity 40, Blur 5, Color-Black
Repeat until your heart’s content.
Save as a PSP Image so everything is saved as layers
DONE I hope you enjoyed this tut
If you have any problems please feel free to e-mail me at: starladystudio@bellsouth.net
HUGS StarLady
I just got an amazing e-mail from a friend of mine in one of my graphics groups.
Paul Smith :
He lived at Rose Haven Nursing Home (
Paul Smith, the man with extraordinary talent was born in
Not only had Paul beaten the odds of a life with spastic cerebral palsy, a disability that impeded his speech & mobility but also taught himself to become a master artist as well as a terrific chess player even after being devoid of a formal education as a child.
"When typing, Paul used his left hand to steady his right one. Since he couldn't press two keys at the same time, he almost always locked the shift key down and made his pictures using the symbols at the top of the number keys. In other words, his pictures were based on these characters ..... @ # $ % ^ & * ( ) _ .
Across seven decades, Paul created hundreds of pictures. He often gave the originals away. Sometimes, but not always, he kept or received a copy for his own records.
As his mastery of the typewriter grew, he developed techniques to create shadings, colors, and textures that made his work resemble pencil or charcoal drawings."
This great man passed away on June 25, 2007, but left behind a collection of his amazing artwork that will be an inspiration for many.
|
Here are a few YouTube links that tell a bit more about him, his gift and of course shows many of his works of art. The last link shows all the pictures that I was unable to retrieve from the e-mail I received and many more.
Click HERE
Click HERE This link tells that Paul Smith was born with "Spastic Paraltsis" I wasn't sure if that had anything to do with Cerebral Palsy and apparently it does. You can read a small article HERE.
Click HERE
Click HERE
Enjoy! HUGS StarLady

Click on tag to see full size
This tutorial is written for those with working knowledge of PSP.
I used PSP 9 for this tutorial, but it could be done with other versions I'm sure.
~Supplies you will need~
1 Tube of choice – I used the awesome work of Jennifer Janesko. Please do not use her work without a license from C.I.L.M .
Free Scrap Kit –Black Grape HERE at Candy’s Treat blog. Thank you!
Word Art by Missy HERE as I was unable to find her site, but Thank you Missy!
If someone knows where her site is please let me know.
Font of choice
Eye Candy 4000 Gradient Glow
~Okay Let’s get started~
Don’t forget to rename layers as you go
You might want to Adjust > Sharpen after you resize anything you need to.
Open a 600 x 600 transparent image (we will resize later)
Flood Fill with white
Open and minimize “Black Swirl” paper
Material Palette > Background –select the paper as a “Pattern-scale 50,” Foreground- Purple chosen from the paper
Grab your Rectangle Pre-set Shape Tool > Line style – Diamond, Width-6
Draw out a rectangle (use my tag as an example), Convert to a Raster & add a drop shadow or Eye Candy 4000 > Gradient Glow –Glow width 5, Color –Gray
Image > Rotate > Free Rotate – 15 Left- move rectangle to the right a bit
Layers > Duplicate, Image > Mirror
Open and minimize “Grape Swirl” paper
Material Palette > Background –select the paper as a “Pattern-scale 50,” Foreground- Purple chosen from the paper
Grab your Rectangle Pre-set Shape Tool > Line style – Diamond, Width 6
Draw out a rectangle a lil’ smaller than the first (use my tag as an example), Convert to a Raster & add a drop shadow or Eye Candy 4000 > Gradient Glow –Glow width 5, Color –White
Image > Rotate > Free Rotate – 15 Right- move to the right a bit
Layers > Duplicate, Image > Mirror
X out the white background, Merge > Merge Visible, un-X white background
Layers > Duplicate –papers, Image > Resize by 80%- resize all unchecked
Layers > Duplicate – smaller papers, Image > Resize by 80%- resize all unchecked
X out the white background, Merge > Merge Visible, un-X white background
Copy & paste “Heart Ribbon3” add a drop shadow or Eye Candy 4000 > Gradient Glow –Glow width 5, Color –Black
Copy & paste “Heart Ribbon1” add a drop shadow or Eye Candy 4000 > Gradient Glow –Glow width 5, Color –Black, position at the top of the papers
Layers > Duplicate, Image > Mirror
Copy & paste “Glitter Swirl 1” add a drop shadow or Eye Candy 4000 > Gradient Glow –Glow width 5, Color –Black
Copy & paste main tube as New Layer, Resize 120% , use deform tool to stretch her the rest of the way out so that her edges do not show
Drop Shadow – V,H (-5), Opacity 40, Blur 5, Black
Copy & paste “Flower 5, “resize by 60%
Copy & paste “Flower 6, “resize by 40%, position on top of “Flower 5”
Merge > Merge Down –both flowers, add a drop shadow or Eye Candy 4000 > Gradient Glow –Glow width 5, Color –Black
Position the flowers layer under the “Glitter Swirl”
Copy and paste “Beads 2” as a new layer – resize 80%, add a drop shadow or Eye Candy 4000 > Gradient Glow –Glow width 5, Color –light purple
Merge > Merge Down all 3 “Papers” layers
Merge > Merge Down all 3 “Heart Ribbon” layers
Merge > Merge Down both “Beads” layers
Copy and paste “Black-Embellishment” as a new layer – resize 80%, add a drop shadow or Eye Candy 4000 > Gradient Glow –Glow width 5, Color –light purple
Position below “Flowers” Layer
Copy and paste “Bow 4” as a new layer, resize by 60%, add a drop shadow or Eye Candy 4000 > Gradient Glow –Glow width 5, Color –Black
Choose Word Art from Missy, add a drop shadow or Eye Candy 4000 > Gradient Glow –Glow width 5, Color –light purple
Layer Palette > 7 layers from top to bottom should be: Word Art, Main Tube, Black Bow, Heart Ribbons, Black Glitter Swirl, Beads, Flowers, Black Embellishment, Papers & white background
Image > Resize –ALL by 80%
Apply all Copyright Credits
Save a Blank- File > Save As > JPEG
Add your name, Lokas > Gel and Eye Candy 4000 > Gradient Glow –Glow width 3, Opacity 40 Color –White
Save As > JPEG
DONE I hope you enjoyed this tut
If you have any problems please feel free to e-mail me at: starladystudio@bellsouth.net
HUGS StarLady
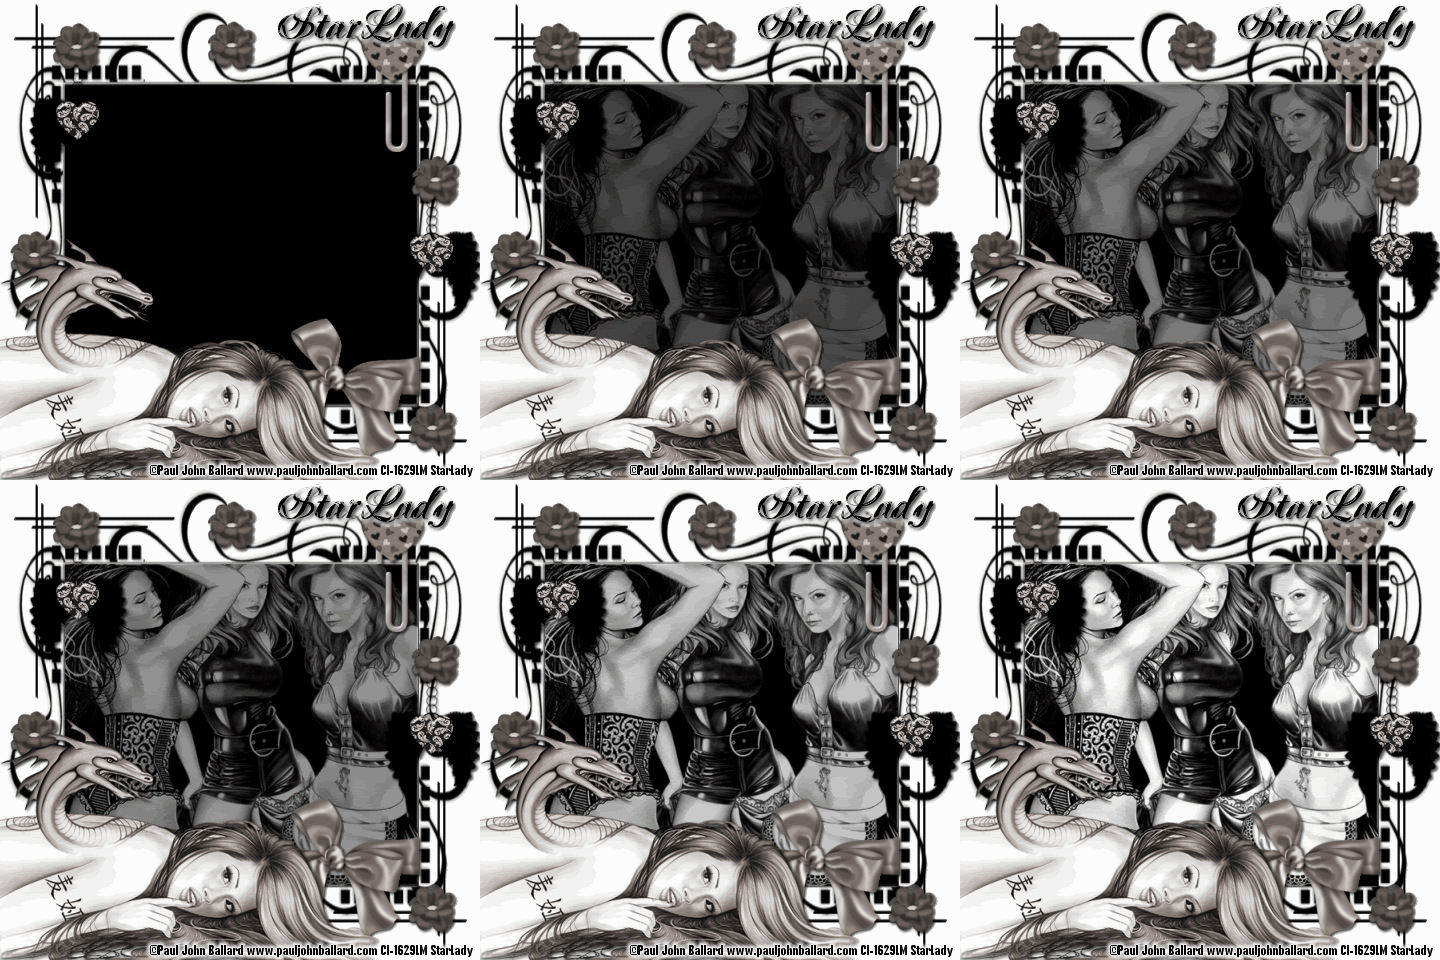
Click on tag to see full size
This tutorial is written for those with working knowledge of PSP.
I used PSP 9 for this tutorial, but it could be done with other versions I'm sure.
~Supplies you will need~
4 tubes of choice – I used the awesome work of Paul John Ballard. Please do not use his work without a license from C.I.L.M .
Mask 63 by Zuzzanna –You can get the Mask HERE about half way down the page. Thank you Zuzzanna!
Scrap Kit –Girly Crush “Freebie Add On” HERE at Candy’s Treat blog. Thank you!
Font of choice
~Okay Let’s get started~
Don’t forget to rename layers as you go
You might want to Adjust > Sharpen after you resize anything you need to.
Open and minimize mask in PSP
Open a 600 x 600 transparent image (we will resize later)
Flood Fill with white
New Raster Layer > Flood Fill with Black
Layers > New Mask Layer > From Image (Source Luminance & Invert Mask Data checked)
Layer Palette > Delete Mask Layer > Merge > Merge Group
Grab 3 tubes you would like to use > Copy and Paste As New Layers
Position & resize as you like over the “
Merge > Down all of the tubes > X-Out “3 Tubes” layer for now
Use your Rectangle Selection tool to select the “
Activate & un-X “3 Tubes layer” > Selections > Invert > Hit Delete on your keyboard
Selections > Select None
While still on the “3 Tubes” Layers -Adjust > Hue & Saturation > Colorize >
Copy & Paste “Wrapped Bow 2” from the scrap kit > Resize by 60 > Add a drop shadow
Position so that it looks like it “wraps” around the mask
Copy & Paste “Paper Clip 5” from the scrap kit > Resize by 60
Position as on my tag, use the Eraser to erase part of the paper clip to make it look “clipped” onto the mask- add a drop shadow
Copy & Paste “featherwingsCharm3” from the scrap kit > Resize by 60 –add a drop shadow
Duplicate and position as on my tag.
Copy & Paste “flower 14” as new layer > Add a drop shadow > Duplicate as many times as you like and position around the tag
Copy and Paste the 4th tube (main tube) as a new layer –at the top of the layer palette, resize if needed and position on your tag
X- out the white background, Mask, 3 background tubes, and the main tube
Merge > Merge Visible all of the “Elements” left on the tag
While still on the “Elements” Layer -Adjust > Hue & Saturation > Colorize >
Un-X all layers and repeat Colorize on the Main tube
From top to bottom in the layer palette you should have –Main Tube, Elements, 3 Tubes, Mask and White Background
Image > Resize –ALL by 80%
~Have Animation Shop open~
Activate the “3 Tubes” layer > Opacity to 0, Edit > Copy Merged in PSP, Right Click on workspace in AS > Paste as New Animation
Back to PSP - 3 Tubes Layer > Opacity to 20, Edit > Copy Merged in PSP, Right Click the on tag in AS > Paste > After Current Frame
Back to PSP - 3 Tubes Layer > Opacity to 30, Edit > Copy Merged in PSP, Right Click the on tag in AS > Paste > After Current Frame
Repeat – Increasing the Opacity by 10 each until you have pasted the last layer (opacity at 100) (total 10 frames)
In AS - Edit > Select All, Animation > Frame Properties change to 25, View Animation –the 3 tubes should fade in nicely.
Back to PSP- write out copyright credits, Edit > Copy, In AS Right Click on the workspace-Paste As New Animation, Edit > Copy-credits, Make sure to hit the Propagate Paste button in the tool bar, Right Click on your tag –Paste > Paste Into Selected Frame
Save the Blank as a GIF
Back to PSP- write out your name, Edit > Copy, In AS Right Click on the workspace- Paste As New Animation, Edit > Copy-name, Right Click on your tag –Paste > Paste Into Selected Frame
Save as a GIF.
DONE I hope you enjoyed this tut
If you have any problems please feel free to e-mail me at: starladystudio@bellsouth.net
HUGS StarLady
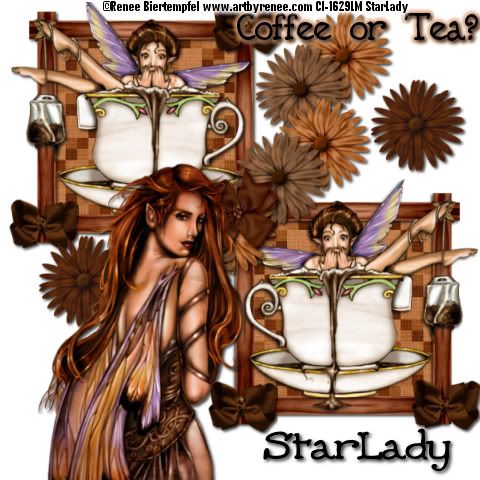
Click on tag to see full size
This tutorial is written for those with working knowledge of PSP.
I used PSP 9 for this tutorial, but it could be done with other versions I'm sure.
I used the wonderful artwork of Renee Bietempfel. Please do not use her artwork without a license from C.I.L.M.
~Supplies you will need~
I am using a free kit called SM Coffee you can get it HERE at Sirena Mala Designs thanks darlin’ it is awesome!
Don’t forget to rename the layers as you go.
Open a 600 x 600 transparent image and flood fill white (we will resize later)
Open the “SM Coffee Frame 5,” copy and paste as a new layer.
Image > Resize the frame by 60 (resize all unchecked)
Position frame in the top left of the tag
Click inside the frame with the Magic Wand, Selections > Modify> Expand by 2
Choose a paper (I used paper 1)
New Raster, Copy and Paste Into Selection, move below frame layer
Selections > Select None
Add a Drop Shadow > 2, 2, 80, 5 -Black
Copy and paste tube as a New Layer, Resize by 60
Drop Shadow the tube
X out the white background and Merge> Merge Visible everything else, Rename “Frame”
Un-X the white background
Duplicate the “Frame” layer, Image > Mirror and position as on my tag
X out the white background and Merge > Merge Visible the 2 “Frame” layers, Rename the layer “Frames”
Copy and paste to different color flowers as New Layers, Resize at 20, Drop Shadow both and position as on my tag in the corner of the “Frames” layer
X out the white Background layer and the Frames layer
Merge > Merge Visible the 2 Flowers
Un-X the white background and Frames
Duplicate Flowers layer 3 times (total 4 layers) and position as on my tag
Merge > Merge Down until all the Flowers are Merged together
Copy and Paste another color flower, Resize by 20 and add a drop shadow
Duplicate the Flower and position both as on my tag
X out the background and Frames layer Merge> Merge Visible, Rename “Flowers”
Un-X the white background and Frames
Copy and Paste a bow New Layer, Resize by 20, and add a drop shadow
Position the bow in the middle of the flower in the center of the tag
Copy and Paste another color bow as a New Layer, Resize by 20, and add a drop shadow
Duplicate the bow 3 times (total 4 bows) position them in the corners of the Frames
Copy and Paste another tube, resize if needed and add a drop shadow
I added “Coffee or Tea,” added a drop shadow >Effects > Gradient Glow > Change the Glow Width to 5 and the color
Add all copyright credits > Save As > JPEG
Add a name > Save As > JPEG
DONE I hope you enjoyed this tut
If you have any problems please feel free to e-mail me at: starladystudio@bellsouth.net
HUGS StarLady
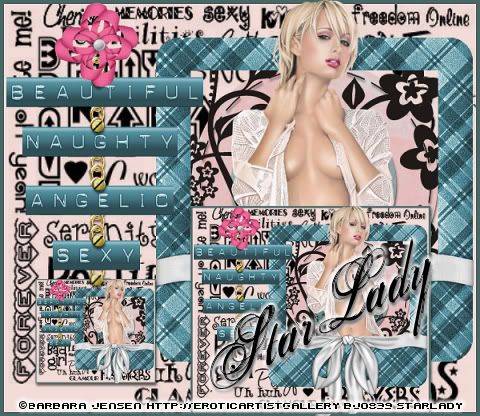
Click on tag to see full size
This tutorial is written for those with working knowledge of PSP.
I used PSP 9 for this tutorial, but it could be done with other versions I'm sure.
I used the wonderful artwork of Barbara Jensen. Please do not use her artwork without a license from HER SITE .
Optional- Eye Candy 4000 Gradient Glow
Font of choice
~Supplies you will need~ Zip HERE
In zip file:
Clarey’s Dymolabels
Clarey’s Funky Scrapkit
Clarey’s Rubylicious Scrapkit
Please visit Clarey HERE. Thank you Clarey!!
Chain and flatpin (can’t seen to find the screw I used)
Mask
If any of the supplies are yours please let me know so I can give you proper credit.
~Okay Let’s get started~
Don’t forget to rename layers as you go
Open and minimize mask in PSP
Open a 600 x 600 transparent image (we will resize later)
Flood Fill with a color that compliments your tube
New Raster layer, Flood Fill with black
Apply Mask -Layers > New Mask Layer > From Image
Layer Palette > Delete Mask layer > Merge > Merge Group
Open a Frame in Rubylicious Scrapkit. I used Frame 3.
I used the freehand tool> point to point to select the frame (except the bow)
Adjust> Hue & Saturation> Colorize
Copy and Paste Tube as new layer (resize if needed)
To make the tube stick out: Use the freehand> point to point to select all of the tube that would cover up the bow on the frame. Hit Delete on your keyboard
Merge the frame and Tube
Copy and paste 4 of Clarey’s labels (resize if needed)
Adjust > Adjust> Hue & Saturation> Colorize (use the same color you did before)
X out all the labels for now
Copy and paste chain, Image > Rotate > Free Rotate 90
Adjust> Hue & Saturation> Colorize (gold color)
Un-X labels position on the chain as on my tag
Copy and Paste Bow from Funky Scrapkit, position as on my tag
Copy and paste flatpin – Adjust> Hue & Saturation> Colorize (gold color)
Layers > Duplicate for a total of 4 flatpins, position as on my tag
X out the last duplicated flatpin
New Raster – move just above the Mask Layer
To make the frame around the whole tag: Selections > Select All > Selections > Modify >Contract by 2 > Selections > Invert
Flood Fill with a color in-between the ants
Window > Duplicate
Image > Resize > resize about 60 – Resize All Layers checked
Copy, paste and position in front of the large tube and frame on the original tag
Go back to the duplicated tag Edit > Undo Resize
Image > Resize about 40 –Resize All Layers checked
Copy and paste resized tag onto original tag, position on the bottom of the chain
Un-X the 4th flatpin and position as on my tag
Image > Resize > Resize all about 80% to be in accordance with Barbara Jensen’s TOU > Image > Image Information-to see the size of the tag.
Add Copyright Credits, Save As a blank JPEG
Go back add your name > Eye Candy 4000 Gradient Glow –change “Glow Width” to 5, Color -White
and Save As again.
DONE I hope you enjoyed this tut
If you have any problems please feel free to e-mail me at: starladystudio@bellsouth.net
HUGS StarLady
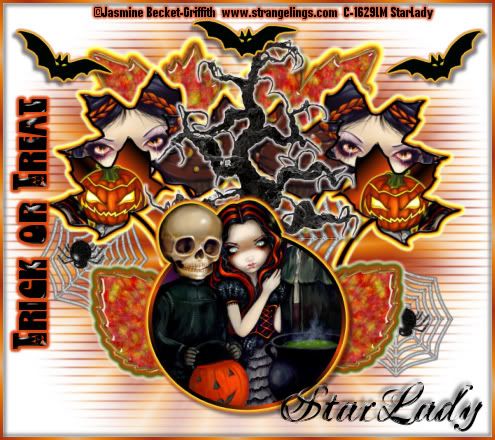
Click on tag to see full size
This tutorial is written for those with working knowledge of PSP.
I used PSP 9 for this tutorial, but it could be done with other versions I'm sure.
I used the wonderful artwork of Jasmine Becket-Griffith. Please do not use her artwork without a license from C.I.L.M.
~Supplies~
I actually only used 2 tubes in this tag, but it is up to you.
The Spider I used is part of a scrapkit at Delicious Scrap in her free kits section called "SpookyLicious" Thank you SO much darlin'!
The Leaves, Web, Tree, Bats and side Font I have HERE . If any of these items are yours please let me, so I can give you proper credit.
Please use a mask of your choice.
Please use your choice for the second (name) font.
Please use a Gradient of your choice.
Plugins
Eye Candy 4000-"Gradient Glow"
and a standard PSP Effect called "Kaleidoscope"
Optional-Lokas Software > Gel
Ready? Okay let's get going~
Place pre-set shapes into PSP
Unzip supplies
Open Mask and minimize in PSP
Don't forget to rename your layers as you go.
Open a 600 x 600 transparent image, flood fill white
Add a new raster layer and flood fill with your gradient
Effect > Reflection Effects > Kaleidoscope
settings-
Now go to Layers > New Mask Layer > From Image
Next get out your Pre-Set Shape Tool and look for "Leaf"
Material palette > Foreground > Black Background > Null
Click on picture to see all settings
Draw out one big Leaf.
Layers >Duplicate (repeat until you have 3 big leaves)
Layers > Duplicate the big leaf 1 more time
Image > Resize the leaf to be about half the size of the Big Leaves.
Layers > Duplicate once (total 2 small leaves)
X out all leaves except the original big leaf.
Copy and paste a tube as a new layer
position it over the leaf (resize if needed)
X out the tube layer
Using your magic wand, click inside the leaf
Selections > Modify> Expand by 2
Un-X the tube layer, Selections > invert > hit delete on your keyboard
move tube layer below leaf layer
Right click on leaf layer >Merge > Merge Down (the leaf and tube layer ONLY should be merged)
X out the completed leaf
~Repeat for other 2 big Leaves~
Okay I think you get the point -do the same as above for the small leaves.
Un-X all Big Leaf layers and position as on my tag
Make sure all Big Leaf layers are together in the layer palette
Right click on the top leaf layer > Merge > Merge Down both other leaf layers (all 3 Big Leaves should be merged now)
Un-X both Small Leaf layers and position as on my tag
Grab the "Ellipse Tool"
settings-
Line style > Solid
Width > 6
Material palette > Foreground > a gradient of choice. Background >null
Draw out an Ellipse shape
New Raster layer
move below Ellipse layer
Click inside Ellipse and Flood Fill with a color of choice
Copy and paste another tube as a New Layer
position over ellipse and resize if needed
Layers > Duplicate
X out both tube layers
move bottom tube layer between the Ellipse layer and the New Raster you just made
with the Magic Wand click inside Ellipse layer
Selections > Modify > Expand by 2
Un-X the bottom tube layer
Selections > Invert > hit delete on your keyboard
Un-X top tube layer
Grab the Rectangle Section tool
select all of the tube except the part you want to stick out of the top of the Ellipse
hit delete on your keyboard
Right Click top tube layer > Merge > Merge Down (both tube layers should be merged and look as if sticking out of the Ellipse)
Merge Down all layers dealing with the Ellipse
Effects > Eye Candy 4000 >Gradient Glow
settings-
on "Basic" Tab
Glow Width > 3
Soft Corners > 25
Overlay Opacity > 100
Draw Only Outside Selection checked
Change color on the "Color" Tab
Click Okay
Repeat Gradient Glow changing the color only.
Click Okay
Effects >dropshadow of choice
Copy and paste leaf tubes as new layers,
move them all just above the Mask Layer
position as on my tag
Merge Down Leaf tubes located at the top of your tag
Repeat Gradient Glow with different colors
Merge Down Leaf tubes located at the bottom of your tag
Repeat Gradient Glow 1 time with white and Opacity > 70
Copy and Paste Tree tube as a new layer and move below the Ellipse layer
Repeat Gradient Glow 1 time with white and Opacity > 70
Copy and paste Spider web as a new layer, resize if needed
Repeat Gradient Glow 1 time with white and Opacity > 70
Layers > Duplicate spider web 2 time (total 3 spider webs, move them all just above Mask Layer, position on tag
Copy and Paste Spider as a new layer and resize if needed
Layers > Duplicate and position where you like
Copy and paste Bats as as new layers, position where you like
Effects > Eye Candy 4000 >Gradient Glow
settings-
on "Basic" Tab
Glow Width > 3
Soft Corners > 25
Overlay Opacity > 100
Draw Only Outside Selection checked
Change color on the "Color" Tab
Click Okay
Repeat Gradient Glow changing the color only.
Click Okay
Make sure all pre-set shape leaves are positioned as you like then Merge all of the leaves together.
Effects > Eye Candy 4000 >Gradient Glow
settings-
on "Basic" Tab
Glow Width > 3
Soft Corners > 25
Overlay Opacity > 100
Draw Only Outside Selection checked
Change color on the "Color" Tab