
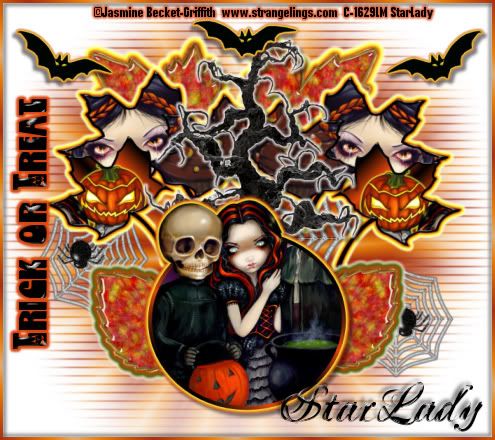
Click on tag to see full size
This tutorial is written for those with working knowledge of PSP.
I used PSP 9 for this tutorial, but it could be done with other versions I'm sure.
I used the wonderful artwork of Jasmine Becket-Griffith. Please do not use her artwork without a license from C.I.L.M.
~Supplies~
I actually only used 2 tubes in this tag, but it is up to you.
The Spider I used is part of a scrapkit at Delicious Scrap in her free kits section called "SpookyLicious" Thank you SO much darlin'!
The Leaves, Web, Tree, Bats and side Font I have HERE . If any of these items are yours please let me, so I can give you proper credit.
Please use a mask of your choice.
Please use your choice for the second (name) font.
Please use a Gradient of your choice.
Plugins
Eye Candy 4000-"Gradient Glow"
and a standard PSP Effect called "Kaleidoscope"
Optional-Lokas Software > Gel
Ready? Okay let's get going~
Place pre-set shapes into PSP
Unzip supplies
Open Mask and minimize in PSP
Don't forget to rename your layers as you go.
Open a 600 x 600 transparent image, flood fill white
Add a new raster layer and flood fill with your gradient
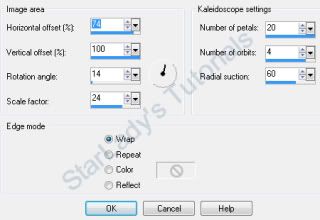
Effect > Reflection Effects > Kaleidoscope
settings-
Now go to Layers > New Mask Layer > From Image
Next get out your Pre-Set Shape Tool and look for "Leaf"
Material palette > Foreground > Black Background > Null
Click on picture to see all settings
Draw out one big Leaf.
Layers >Duplicate (repeat until you have 3 big leaves)
Layers > Duplicate the big leaf 1 more time
Image > Resize the leaf to be about half the size of the Big Leaves.
Layers > Duplicate once (total 2 small leaves)
X out all leaves except the original big leaf.
Copy and paste a tube as a new layer
position it over the leaf (resize if needed)
X out the tube layer
Using your magic wand, click inside the leaf
Selections > Modify> Expand by 2
Un-X the tube layer, Selections > invert > hit delete on your keyboard
move tube layer below leaf layer
Right click on leaf layer >Merge > Merge Down (the leaf and tube layer ONLY should be merged)
X out the completed leaf
~Repeat for other 2 big Leaves~
Okay I think you get the point -do the same as above for the small leaves.
Un-X all Big Leaf layers and position as on my tag
Make sure all Big Leaf layers are together in the layer palette
Right click on the top leaf layer > Merge > Merge Down both other leaf layers (all 3 Big Leaves should be merged now)
Un-X both Small Leaf layers and position as on my tag
Grab the "Ellipse Tool"
settings-
Line style > Solid
Width > 6
Material palette > Foreground > a gradient of choice. Background >null
Draw out an Ellipse shape
New Raster layer
move below Ellipse layer
Click inside Ellipse and Flood Fill with a color of choice
Copy and paste another tube as a New Layer
position over ellipse and resize if needed
Layers > Duplicate
X out both tube layers
move bottom tube layer between the Ellipse layer and the New Raster you just made
with the Magic Wand click inside Ellipse layer
Selections > Modify > Expand by 2
Un-X the bottom tube layer
Selections > Invert > hit delete on your keyboard
Un-X top tube layer
Grab the Rectangle Section tool
select all of the tube except the part you want to stick out of the top of the Ellipse
hit delete on your keyboard
Right Click top tube layer > Merge > Merge Down (both tube layers should be merged and look as if sticking out of the Ellipse)
Merge Down all layers dealing with the Ellipse
Effects > Eye Candy 4000 >Gradient Glow
settings-
on "Basic" Tab
Glow Width > 3
Soft Corners > 25
Overlay Opacity > 100
Draw Only Outside Selection checked
Change color on the "Color" Tab
Click Okay
Repeat Gradient Glow changing the color only.
Click Okay
Effects >dropshadow of choice
Copy and paste leaf tubes as new layers,
move them all just above the Mask Layer
position as on my tag
Merge Down Leaf tubes located at the top of your tag
Repeat Gradient Glow with different colors
Merge Down Leaf tubes located at the bottom of your tag
Repeat Gradient Glow 1 time with white and Opacity > 70
Copy and Paste Tree tube as a new layer and move below the Ellipse layer
Repeat Gradient Glow 1 time with white and Opacity > 70
Copy and paste Spider web as a new layer, resize if needed
Repeat Gradient Glow 1 time with white and Opacity > 70
Layers > Duplicate spider web 2 time (total 3 spider webs, move them all just above Mask Layer, position on tag
Copy and Paste Spider as a new layer and resize if needed
Layers > Duplicate and position where you like
Copy and paste Bats as as new layers, position where you like
Effects > Eye Candy 4000 >Gradient Glow
settings-
on "Basic" Tab
Glow Width > 3
Soft Corners > 25
Overlay Opacity > 100
Draw Only Outside Selection checked
Change color on the "Color" Tab
Click Okay
Repeat Gradient Glow changing the color only.
Click Okay
Make sure all pre-set shape leaves are positioned as you like then Merge all of the leaves together.
Effects > Eye Candy 4000 >Gradient Glow
settings-
on "Basic" Tab
Glow Width > 3
Soft Corners > 25
Overlay Opacity > 100
Draw Only Outside Selection checked
Change color on the "Color" Tab
Repeat Gradient Glow changing the color only.
Click Okay
Type out "Trick or Treat"
Image >Rotate > Free Rotate 90 Left.
Apply a Gradient Glow if you wish
New Raster layer
To make the frame around the whole tag: Selections > Select All > Selections > Modify >Contract by 2 > Selections > Invert
Flood Fill with a color (or gradient) in-between the ants, add a drop shadow
Image> Resize > All layers
Image > Image Information and make sure the size follows C.I.L.M TOU
Apply all Copyright Credits
File > Save As > JPEG
Add your name, Lokas > Gel and a dropshadow
Save As again
DONE I hope you enjoyed this tut
If you have any problems please feel free to e-mail me at: starladystudio@bellsouth.net
HUGS StarLady


No comments:
Post a Comment